BCIT
HRV Installation
HRV stands for Heat Recovery Ventilators. For the fresh air enthusiast and modern times, these units keep a hone full of fresh air.
To install an HRV system, we hang it to the best ceiling studs we can find. Then, we add any reducers that are required.
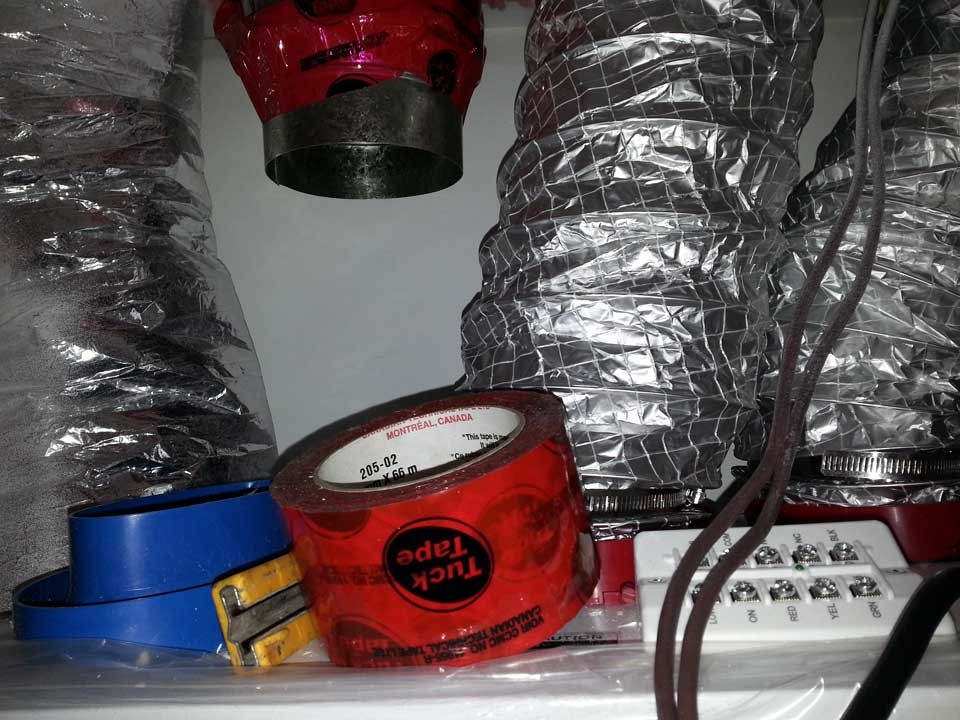
Finally, we make 4 connections; fresh air out, fresh air in, old air out and old air in. If that sounds confusing, this won't.
Fresh air in brings new, fresh air from outside via insulated ducting.
Fresh air out passes the fresh air we took and runs it through the house. This connection uses uninsulated duct hose
Old air out removes the old air passed through the house and sends it outside through insulated ducting. All air coming or going outside uses insulated ducting.
Old air in takes the old air from the house and passes it to the HRV unit.

Dryers
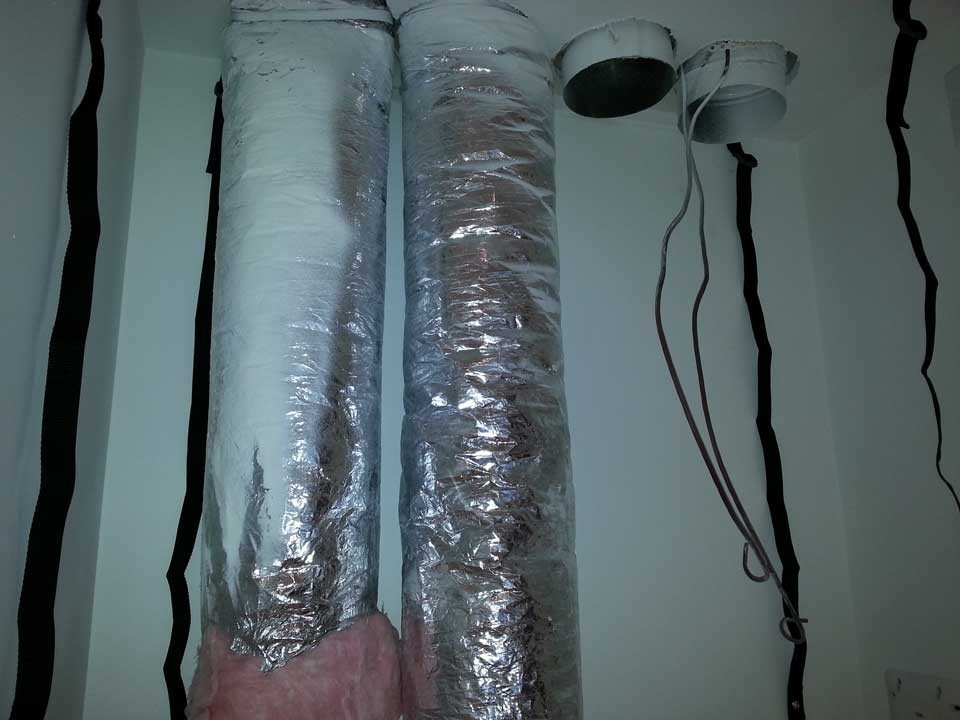
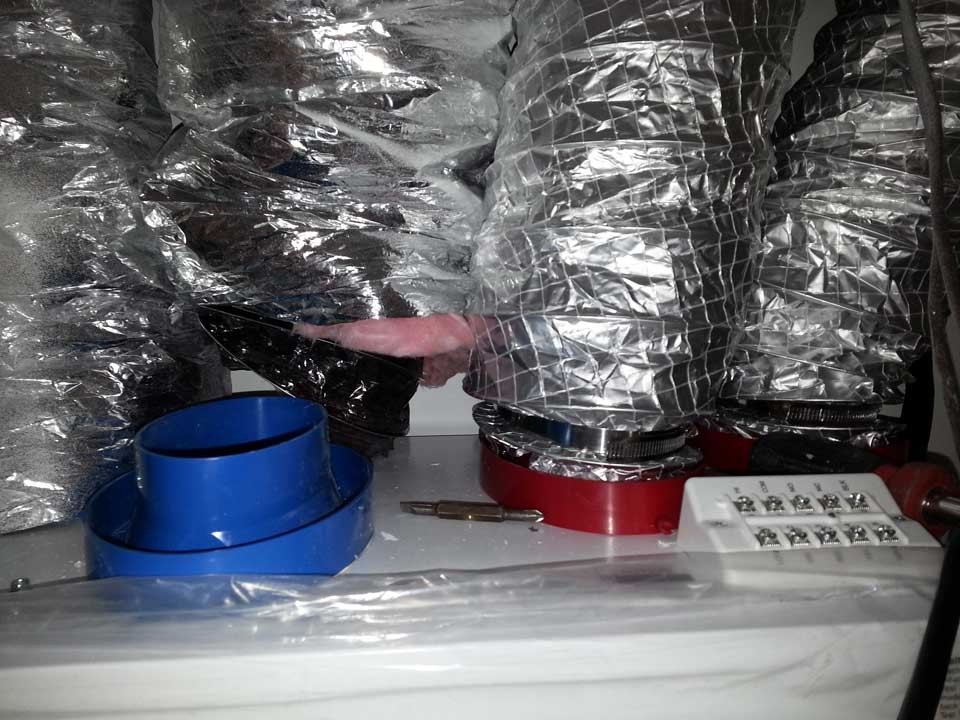
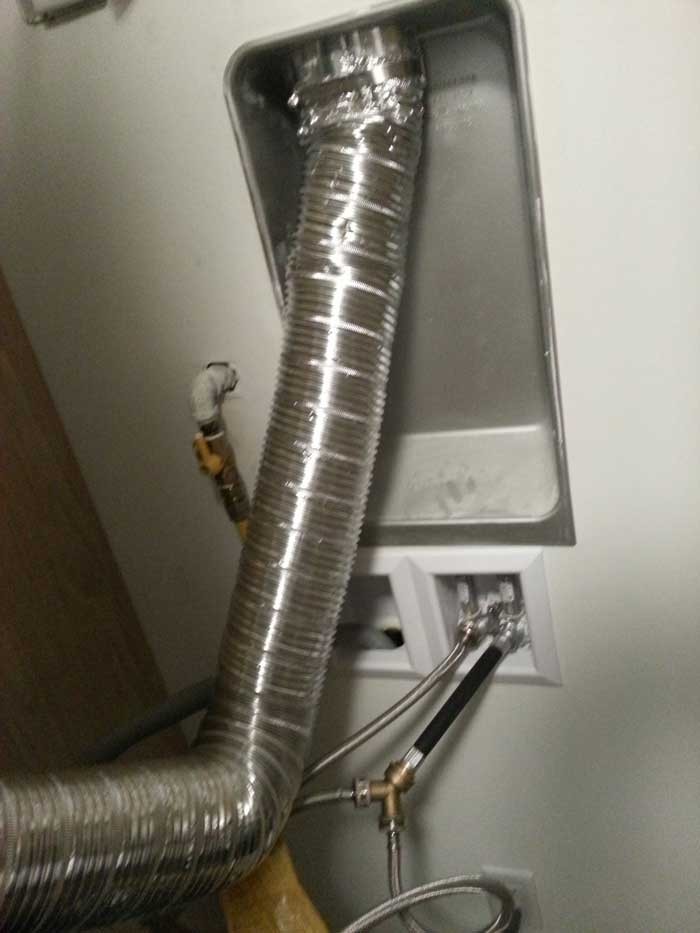
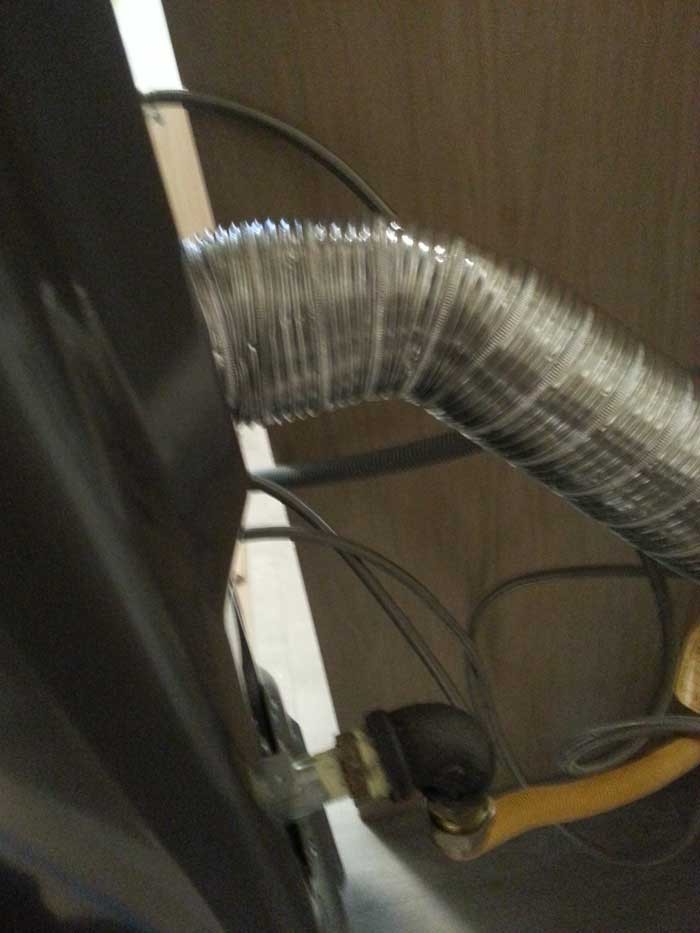
Dryers are rather easy to connect. We use dryer flex and attach both sides. It comes in a 4-ft roll that can be extended to 10-ft if required. The problem with this stuff is that is can be messy and it is not that strong.
With that said, we connect both sides and use large gear clamps to make the connections. Once we have done that, we test and make sure no air leaks between dryer outlet and the furthest connection.
Undermount Kitchen Sink
Many kitchen sinks, or other sinks for that matter can be done with one person. Others can be tricky and two will be the time-saving option. When doing sinks, inserting the tap first will save the nuisance of attempting to add it later when a sink is in the way. For some sinks, doing it after the sink is not that bothersome.
In our case, we will do a simple round sink. To install a sink, we hoist it up with ready rod, wing nuts, a nut, washers and a length of 2x4 with a hole cut in the middle. Once we are a couple inches from the top, we can balance it gently and apply a bead of silicon around the outer edge. We want the bead on the outside so it does not run into the finished sink, thus, leaving an undesired clean-up.
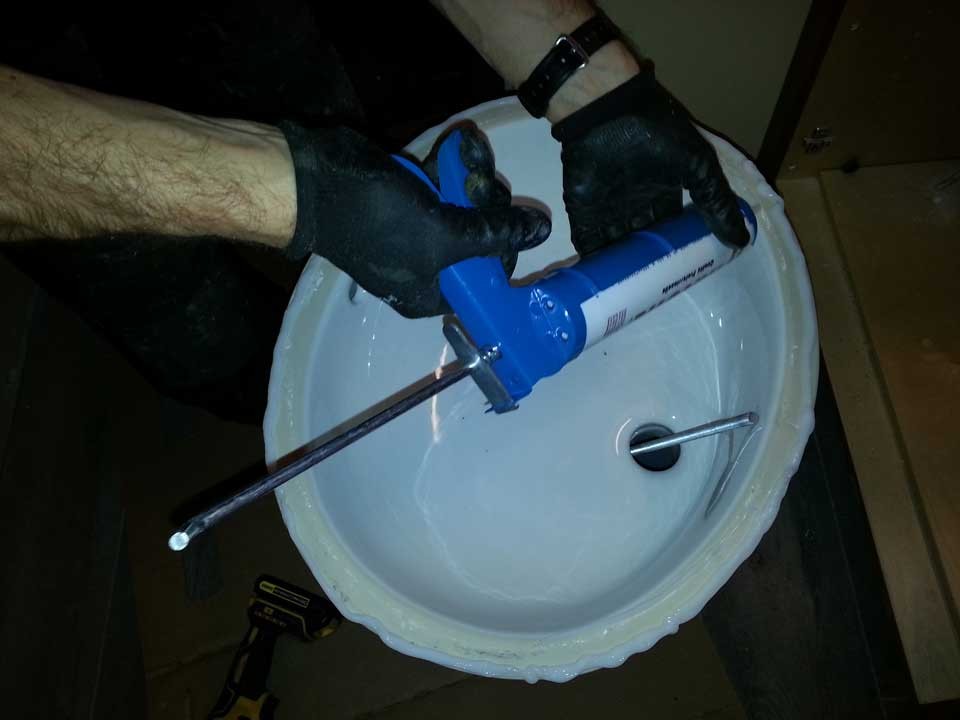
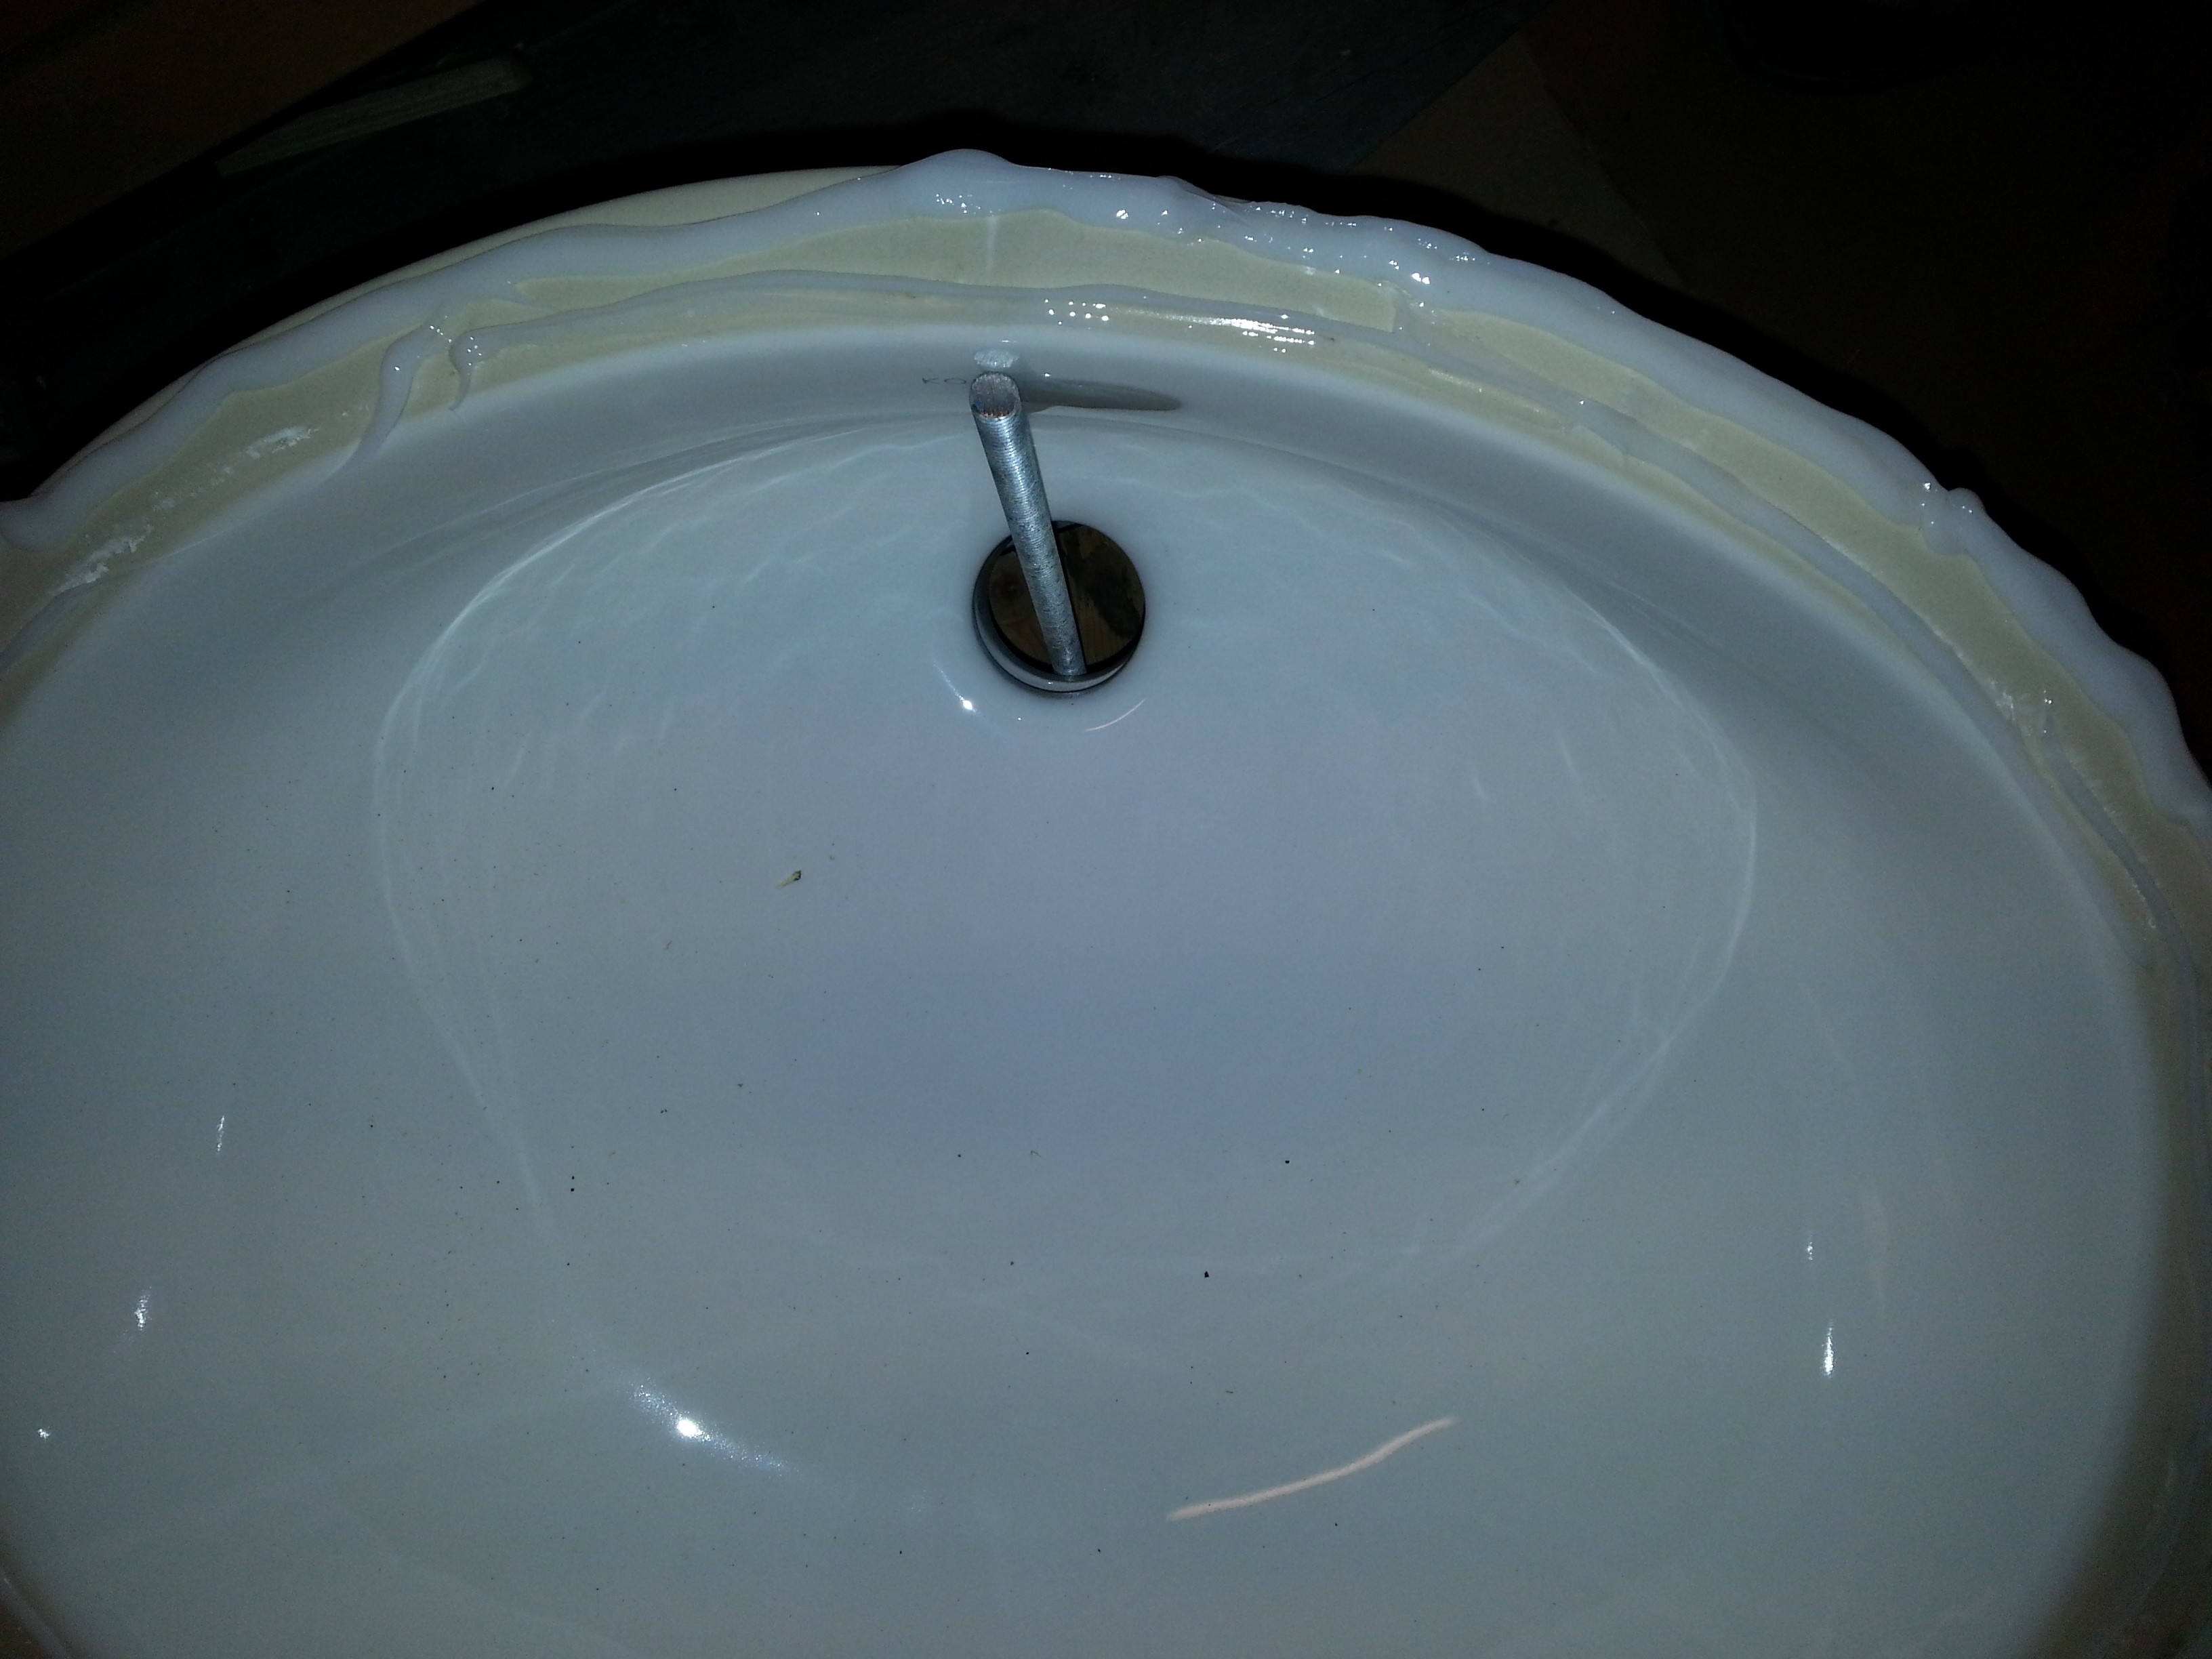
Once we are close to the top, we can use one hand and place the sink in position. We need to keep our hand on the bottom nut with ready rod so we can turn the top wingnut to make it tight.
At this point, we can use our fingers to check the distances all the way around and make sure all is even. We also want to make sure the apparatus is tight so our sink is tight against the bottom.
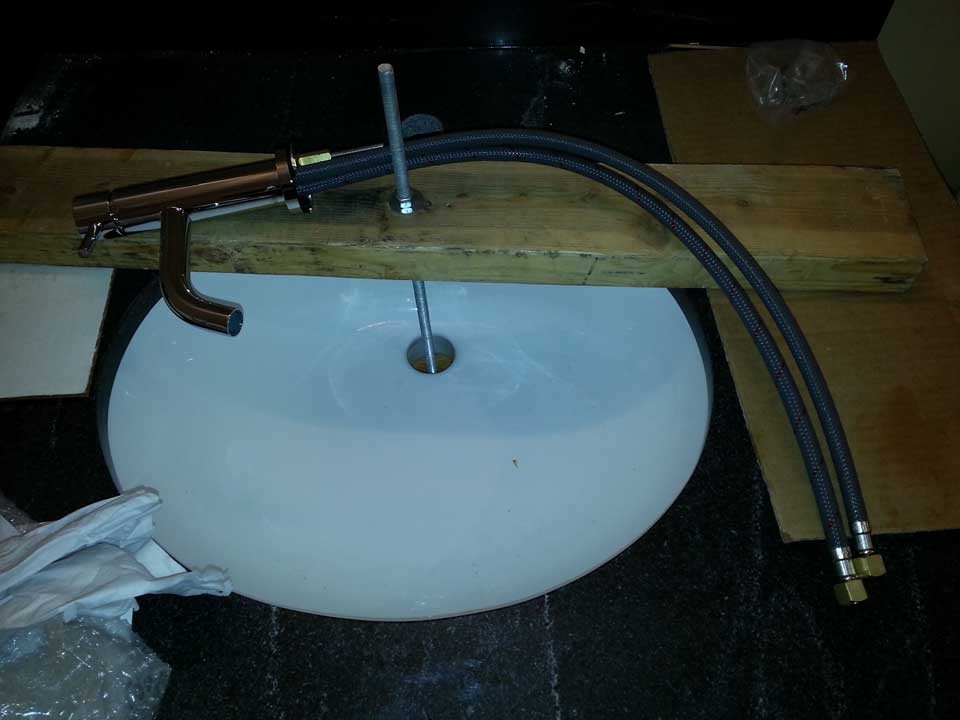
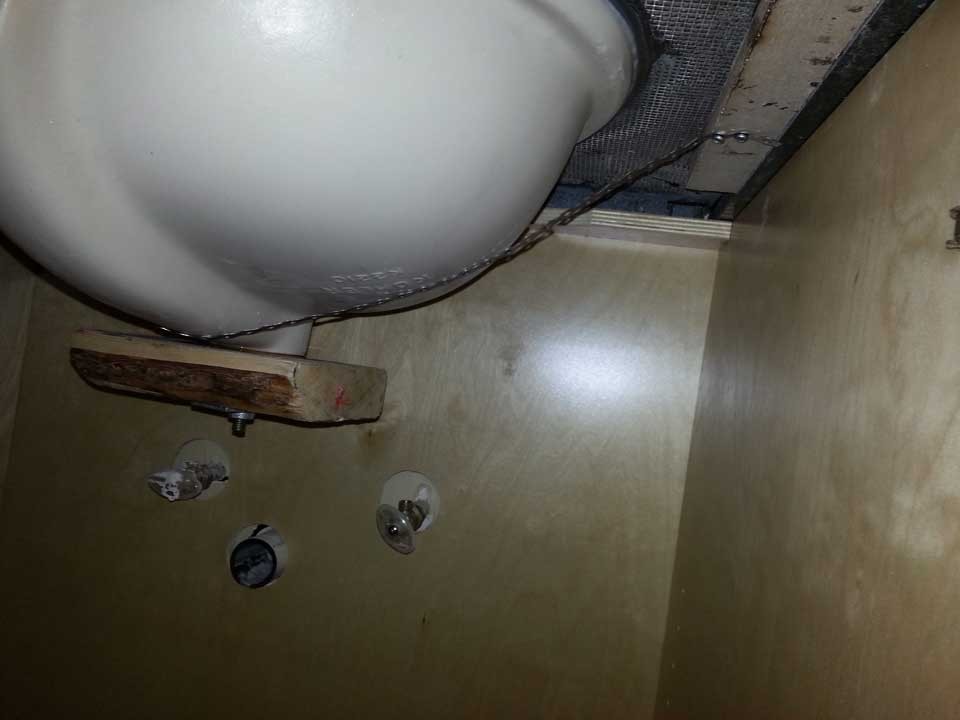
Once we have the perfect position and silicon has done some setting, we can add an extra layer of protection with all-round. When securing the all-round, we want slow action from the impactor so we don't twist it up. In addition, a good screw helps. If the all-round is a little loose, we can add another screw in the next lower hole of one of the sides.
The next steps are to add the drain assembly with a little silicon and fasten to the underside with the kit for the sink.We must be careful here because if not done right, it could leak from various sources on the bottom side. One such culprit is a poor silicon job.
After that, we connect the drainage to the trap arm and setup the water lines.
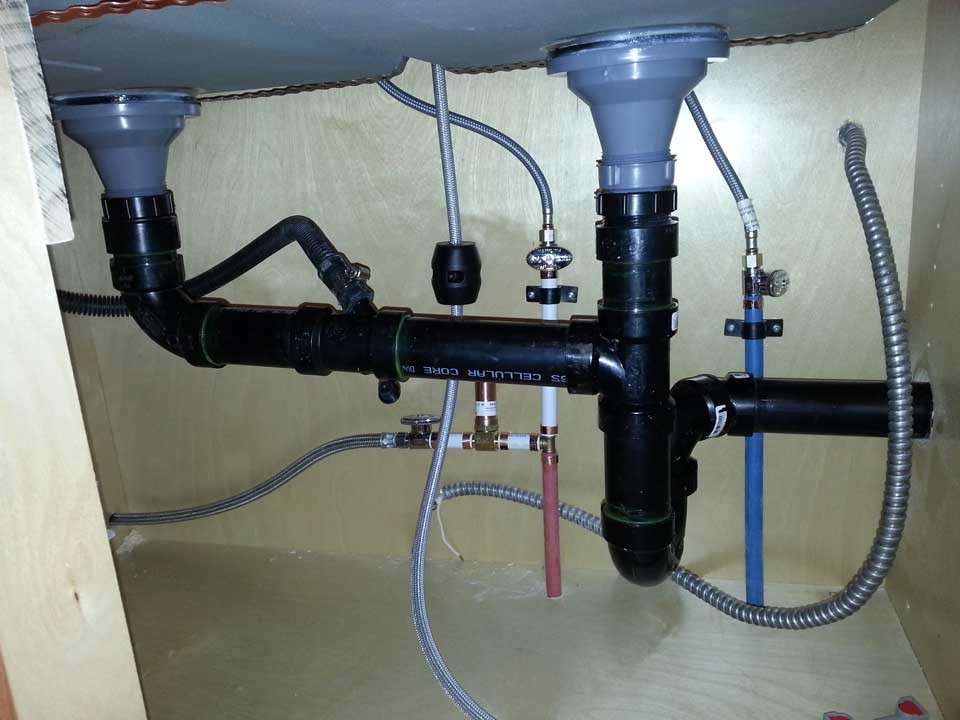
Once we are all setup, we can fill the sink and test the overflow(if exists), sink drain seal and other leaks.
Bathtubs
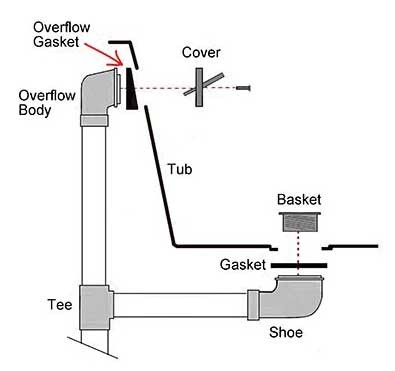
New bathtubs can go real quick, or could be held up if the floor is not perfectly level. Anyways, once a team positions the tub in place and has it sitting perfectly level, we can install the drainage. The drain parts will exist on the tub floor and overflow.
Staring with the drain, we can apply a bead of silicon around the underside, trying to be careful not to drip any around the threads. After that, we can use a drain wrench to secure the bottom drain, ensuring it points directly inline with the top drain. We can dry fit a 1" piece of abs to ensure we have a good line.
Then, the top overflow is assembled. We apply silicon to the backside of the rubber gasket and secure it in place. It becomes obvious which rotation is the last one.
Now, we simply connect the drain to the overflow, which flows downwards to a trap under the tub.
New Toilet Flange
With a new build, or renovation for that matter, we can find ourselves in a position to install a new toilet flange. It is quite easy and usually can be completed in a few minutes(without distractions).
Procedure #1 For Wood Floor
- Cut 2x8 piece of square backing
- Glue backing and screw it place so that flange is centered in the middle according to the exact location in the building plans and cut a 4 5/8" hole with a holesaw. In some cases, we may already have a hole and need to place in top of hole and re-cut.
- Insert the flange and position it so that the t-bolts will fit inside the small grooves at the desired center. If the bolts can be closer to the ends of the small grooves, it will be stronger. However, we may have noticed flanges of more than 35 years with t-bolts smack in the middle and a slight bulge in the flange, yet, coming with a lifetime of no-leaks.
- Once the flange is in position, we can secure it with screws and 1/2-inch copper, pex rings. The rings should protrude from the outer edge of the flange. This can be done for all six holes.
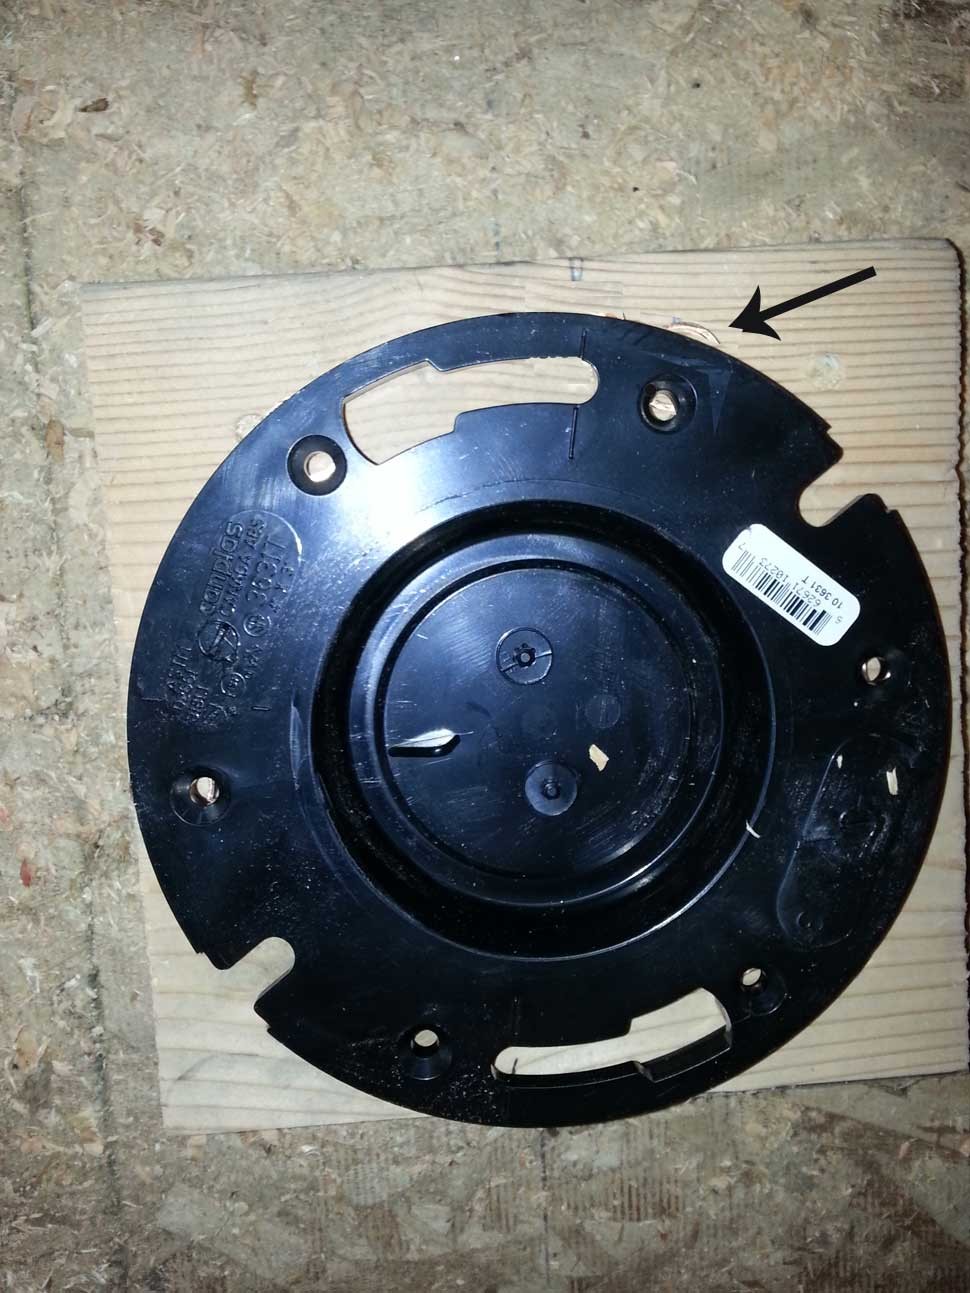
For slab jobs, there is no wood backing. During a rough-in, there is 3-inch pipe that is capped up high for testing. The 3-inch pipe is cut flush, or slightly under the concrete level using a sawzall or flush cut saw.
Then, the burs are cleaned up with a knife or file, while being careful not to drop anything down the chute. After that, the flange is glued into the pipe at the desired position and stomped down on with a foot ensuring it is against the concrete.
Finally, bash pins are used to give it extra strength, even though a flange can hold up over 35 years without bash pin reinforcement.
Commercial Urinal Disassembly and Assembly
Anyone male, who is old enough to talk would know what a urinal is. However, not many would likely take the time to know much more than how to use one. Well, this minor lesson will will dive into those details.
Since disassembly is basically the opposite of assembly, we will not discuss those details, except the minor differences. The minor difference is that the disassembled urinal will have the nipple capped with a taped and piped doped black iron end cap.
Now, let's move on to assembly.
Assembly
To assemble the urinal, the lower piece that connects to the urinal is located inside a bolt that is connected to a small, male threaded fitting that is tight and sealed into its female counterpart that is located under the top of the urinal on the underside of the porcelain.
To make the above mentioned fitting tight(if necessary), we can place a chisel inside the male from the top and make the bottom female tight.
After that, or even before the last procedure, we mount the fitting which is attached to the nipple located on the wall. A discussion ring with chrome is placed behind it before the fitting is threaded on with teflon tape and pipe dope.
Back-wrenching is required with this procedure or a super careful eye is required to ensure the nipple does not turn. A Sharpie mark on the nipple makes it easy to see and track any movement.
Now, we connect the main body to the side and bottom, and connect them tightly. Now, we can turn on the water and test for workability and leaks.
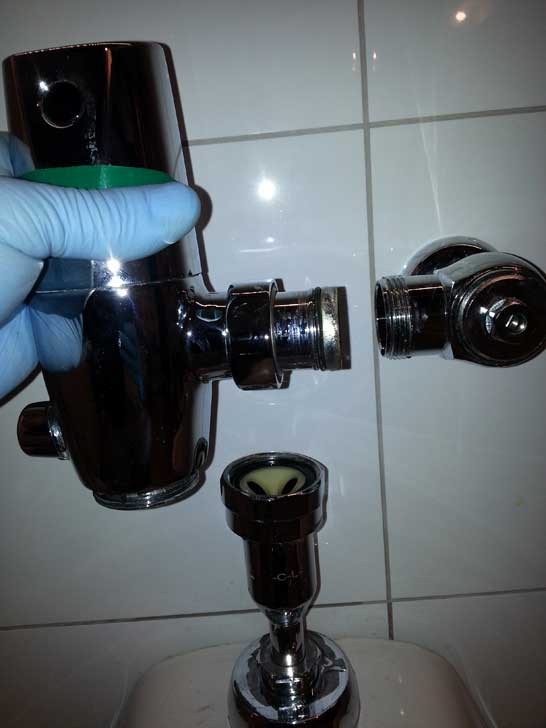
One potential source for leaks is the small piece of chrome that extends from the main body to the female half of the union. If it leaks, it may need tightening, or teflon tape and pipe dope if the o-ring is not doing its job.
Other potential leaks can normally be dealt with by tightening the threaded fittings. To tighten chrome fittings without scratching them, a set of large Channellocks can be used in combination with a rag under the jaws.
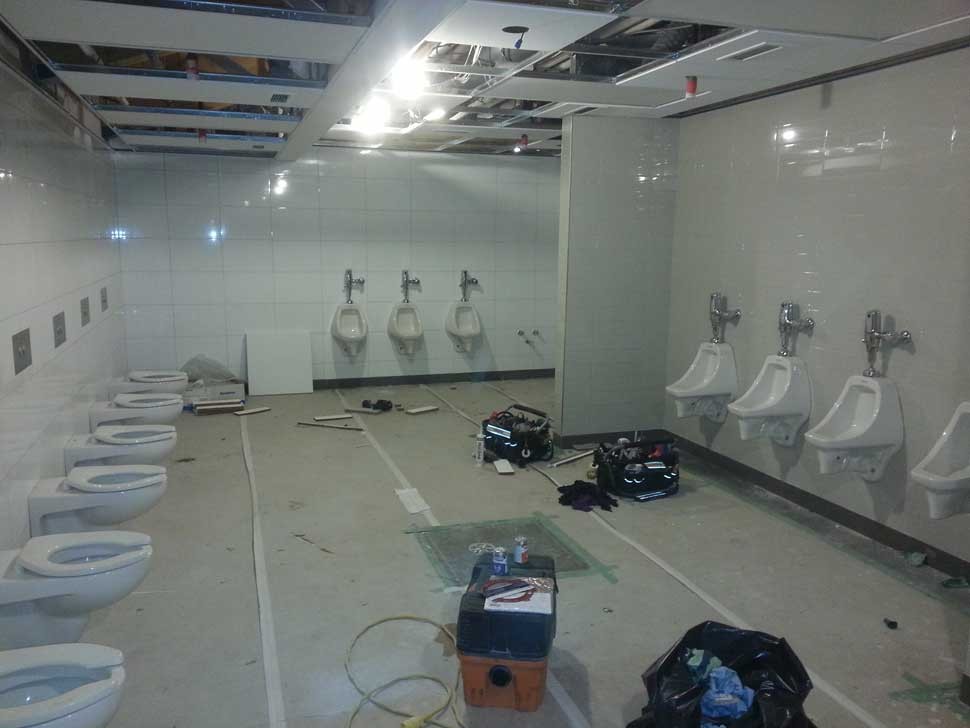
Now, in some circumstances, we could insert the main body and it is not working properly. For example, it could be stuck on perma-flushing. In this case, we need to disassemble the body from the side threads and bottom.
Of course, this starts with turning the water off, or we are in for a complete messup that could require more cleanup time than fix time. Also, after water is off and we disconnect the main body, we can place a bucket to the side where the sideways threads are located since a little water will pour out and run along the side of the urinal.
Once we have a our main body off, we can disassemble the two pieces with an Allen key and a slight twist. Then, we can remove the connection from the battery for a minute or so, reconnect, put the two body pieces back together and reassemble to the urinal.
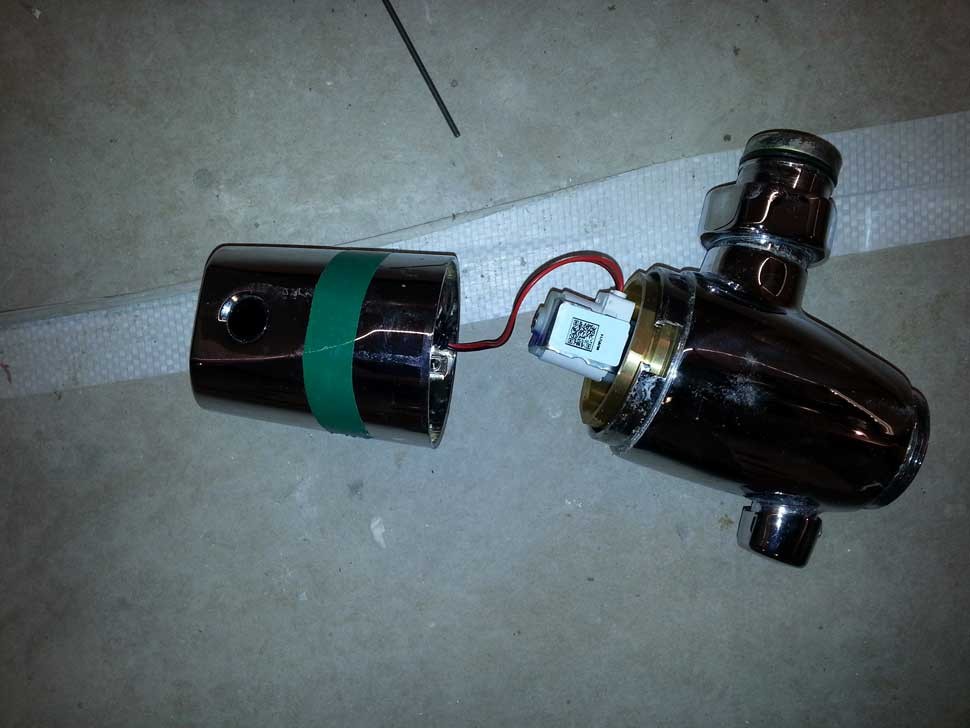
Now, hopefully it works! Real faulty units may fail completely and this may not resolve the problem.
Residential Drainage With Slab
When starting drainage with new construction, the typical process is to start from the master drain on the bottom level and work on up. However, the odd addition could be involved such as installing the top vent through a roof before the roofers do their work on the roof.
So, with that said, let's go through a quick checklist of the process, and cover them in more detail later. It sort of begins with digging out ground for a house with a slab, or crawl space work for a house that has one. This article will deal with the former....a house with a concrete slab and no crawlspace.
Procedure:
- Digging
- Insert Sump(if required)
- Layout and glue pipe on grade
- Cap the pipe
- Testing
Digging
This one is an obvious no-brainer. We grab the spade and dig deep enough to accommodate the graded pipe. Once we know we are good to go, we can move on.
Sump Pump
In some homes, the actual basement of the lot can be much lower than the sewer pipes that collect sewage from the houses in the neighbourhood. Therefore, the drainage much get pumped up from the lowest point in the house drainage system and into the town(or city) sewer lines.
This transfer in handled by a sump pump located in a tank. Thus, as a reminder, all drainage from the house will end up here before it moves out of the house. This includes everything from the toilets, sinks and other waste systems like washing machines and dishwashers.
The sump depth will be determined by the height of the inflow pipe which will exist under the poured concrete. However, the top of the sump and access will be accessible after concrete if poured, for obvious reasons.
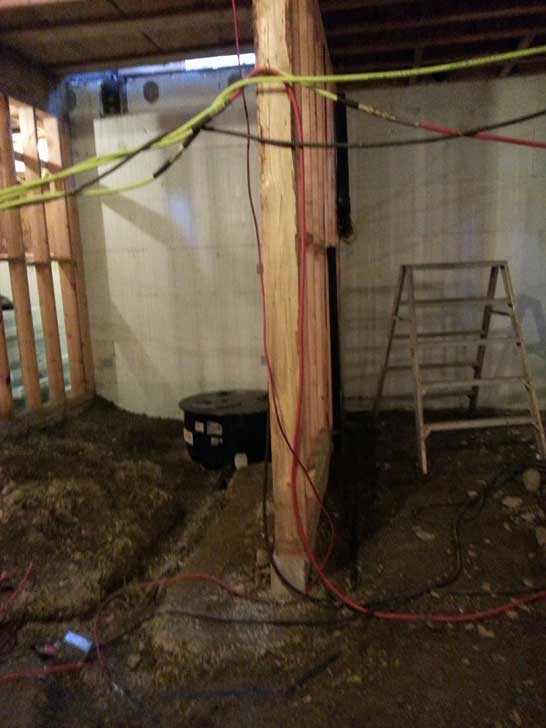
Layout and Glue Pipe
After the digging is complete and the sump is level and back-filled, we can continue assembling the ABS via measuring, cutting, levelling and gluing. After that, we can back-fill and cover up the pipe while leaving the top exposed for the inspector.
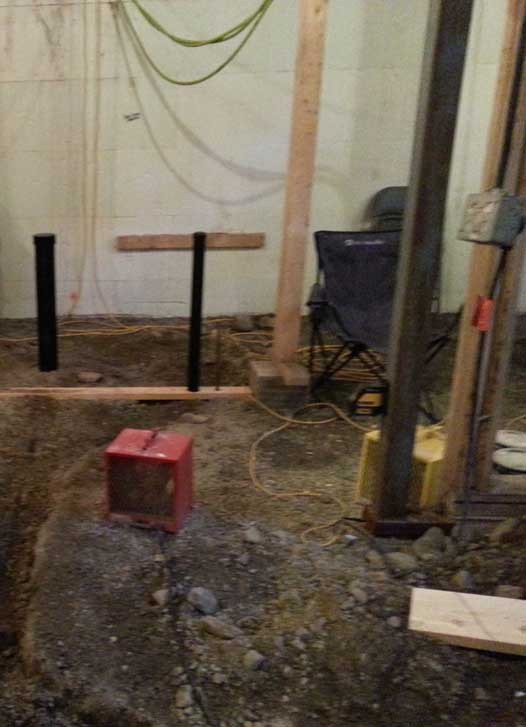
Cap The Pipe
All of the pipe will need to be capped except for one opening which will be taller than the rest, which will be used to fill it up with plain water, water/glycol if the weather is very cold and pipes are at a risk to freeze.
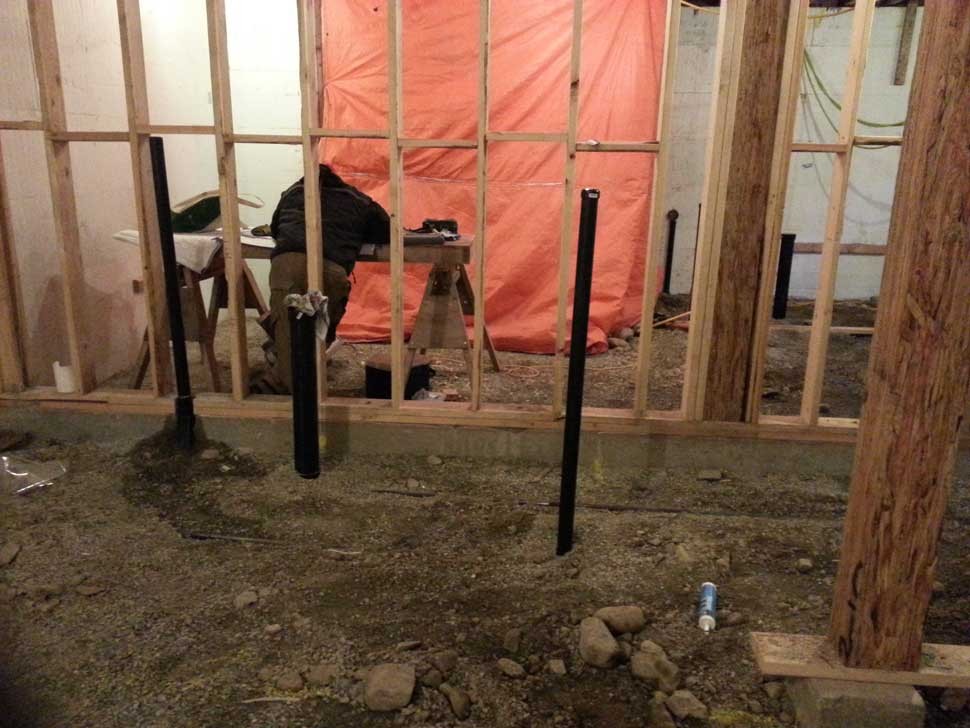
Testing
At this point, we expect the system to hold the water and be leak free. If not, we find the weak spot and ensure it does not leak, and test again.
Dishwasher Replacement
So, that dishwasher crapped out and it is time for a new one. Although we could use some old parts and pipe, we should likely go forward with more, newer parts that won't be potential problems.
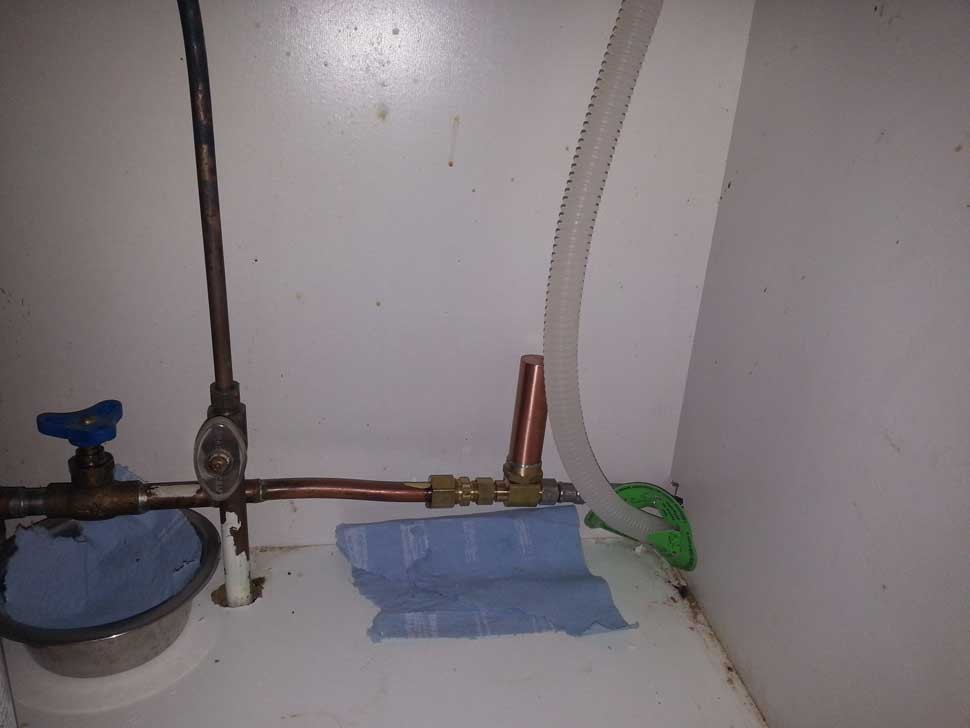
In our case, we will cut the 1/2-inch od copper pipe, add a new compression fitting, hammer arrester and braided hose. However, we could have done something else like soldered on a 1/2-inch brass fitting for pex and gone than route too.
Since the original compression fitting lasted 35 years without leaking and the copper slammed frequently since it had no hammer arrester, the route we chose to go should do.
Procedure
To start with, we turn the shut-off so it is off. Then, we can remove the old drain and feeder pipes to the old dishwasher, and finally, pull it out.
After that, we can prepare the new hose lines and drainage. We can do this with the dishwasher in front of its final position. Once we connect the drain lines and hose to the new dishwasher, we just need to make sure they run under the sink.
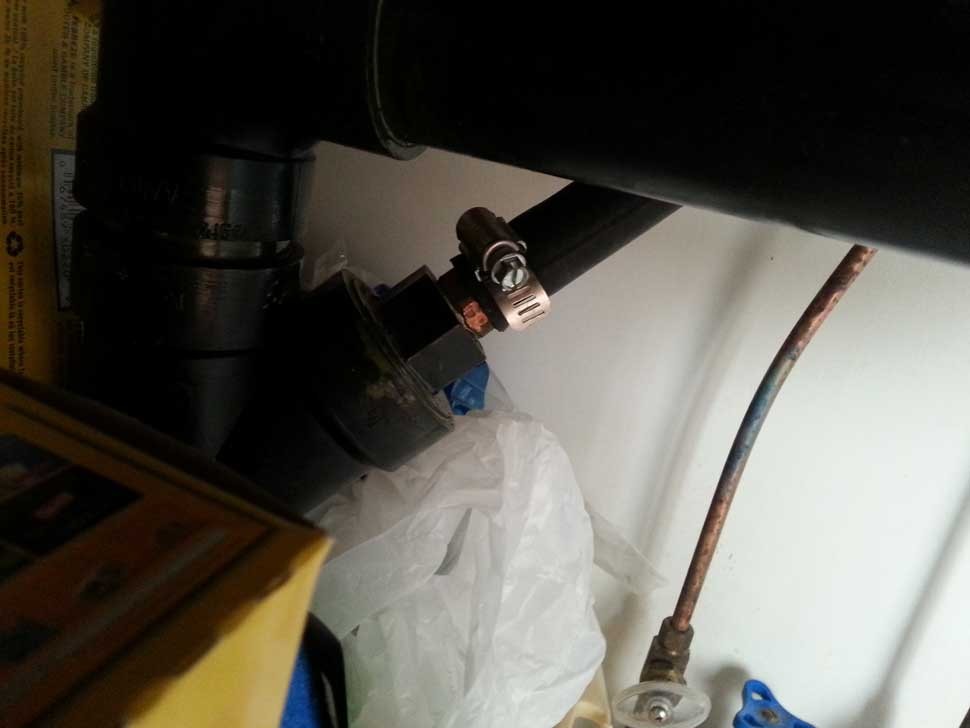
After that, we can connect the drain hose to the abs under the sink and get to work on the copper. Or, we could have done this prep work first. Other way, it comes to the same thing.
In our case, we added a compression fitting to the copper pipe and secured it. It should be tight, but, not real tight. We don't want to damage the old copper the copper will bulge slightly in time around the olive too.
To add the compression fitting, we place the nut over the pipe, followed by an olive. Then, we thread the male in, attach a a hammer arrester and finally the braided hose. The connections for the hammer arrester and hose are slightly tighter than hand tight, but significantly less than forcefull tight since the washers don't need that excessive force to create a water tight seal.
Before:
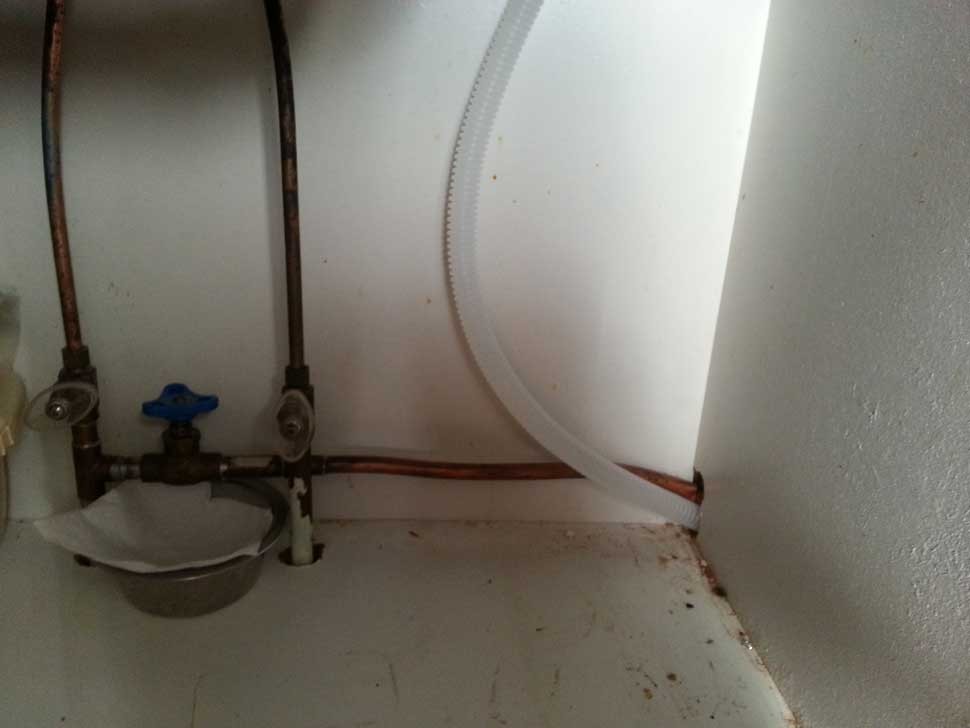
After:
Dishwasher drain connection to sink:
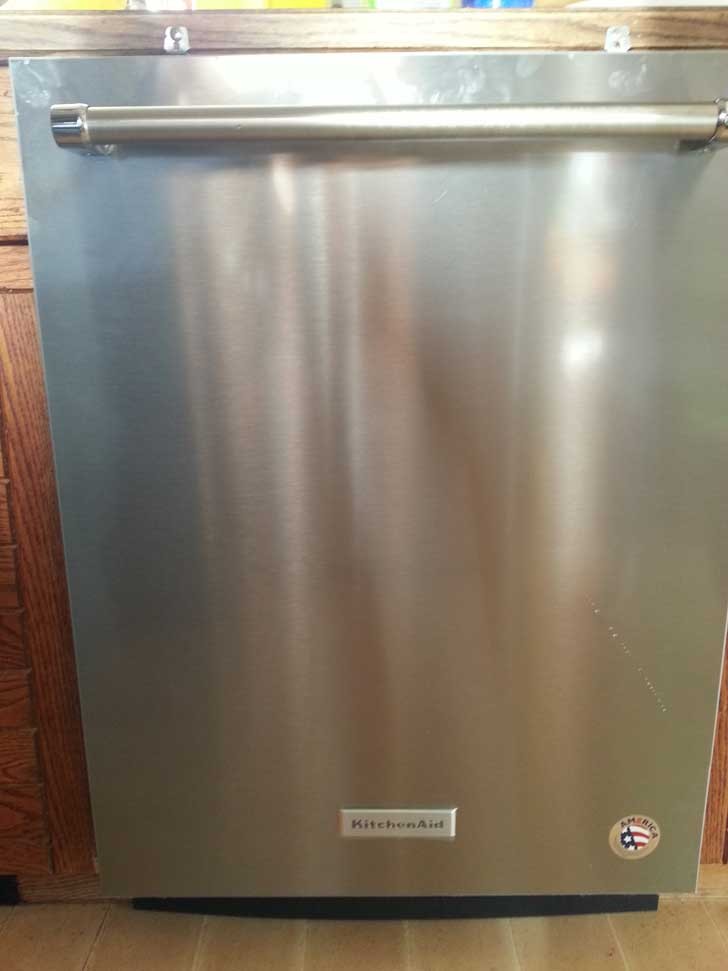
Down the road, shall we ever want to look at connections underneath the dishwasher, we can remove the bottom cover and take a look around.
Gas Hot Water Tanks
Checklist
- Turn off water from tank to house
- Turn off water to tank
- Turn off gas
- Turn pilot off
- Crack tmp valve and drain water to toilet via an inline pump. One end can be a braided hose and the other a regular hose. The drain is at the bottom. A screwdriver is used to open the valve for draining.
- Once tank is drained, remove gas line attached to tank and fittings.
- Cut and remove hot and cold lines from top of tank
- Move tank out and move new tank in. Reconnect new fittings, new copper and perhaps new pex where necessary.
- After reinstall, turn water back on and check for leaks with 'Leak Detection' fluid.
Testing
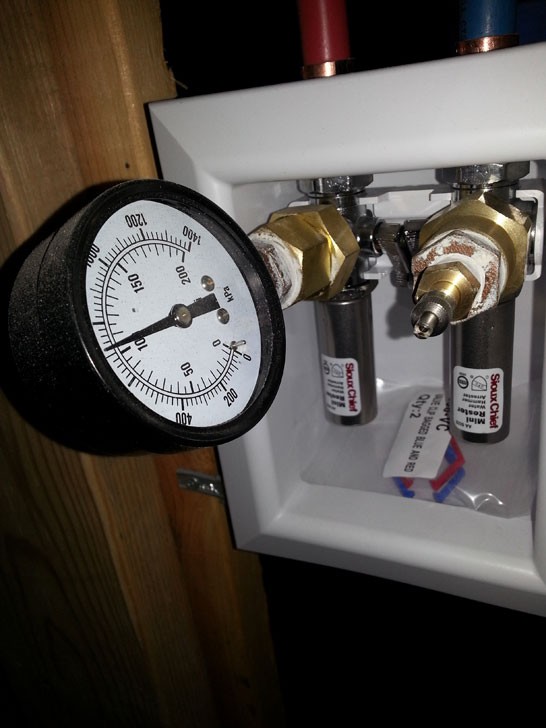
Whether we are doing radiant, gas lines, drainage or water piping, the time will come when we make our tests. Testing for gas, radiant heating and water piping is rather similar using compressed air filled via a valve while we keep an eye on the gauge that gives the psi.
In a perfect world, the psi goes rather unchanged, indicating there are no leaks. Although various companies will use different numbers; some close references are 50 psi for water piping, 30 psi for gas and 50 psi for radiant heating.
Testing for radiant will occur at one of the manifolds. All valves will be open and the gauge and filler cap are inserted into the supply and return after the caps are removed.
For water piping, testing will happen at the washer/dryer hookups; one side will have gauge and the other will have the filler valve.
After we fill radiant or water pipe, we can close the valves and open the gauge ones later to see if the readings are unchanged. Closing them after filling eliminates the possibility of our temporary equipment being a source for leaks.
Testing for drainage is a different deal. We fill all the pipe in the house with water until it leaves the top vent. Then, we inspect everything and look for leaks.
New Toilet Installation
New toilet installation is not much different than removing and reinstalling an old toilet. The only differences are that the toilet back and toilet seat assembly which come with instructions when you buy a toilet. In some cases, toilets bowls and backs are a single piece which obviously does not require back assembly.
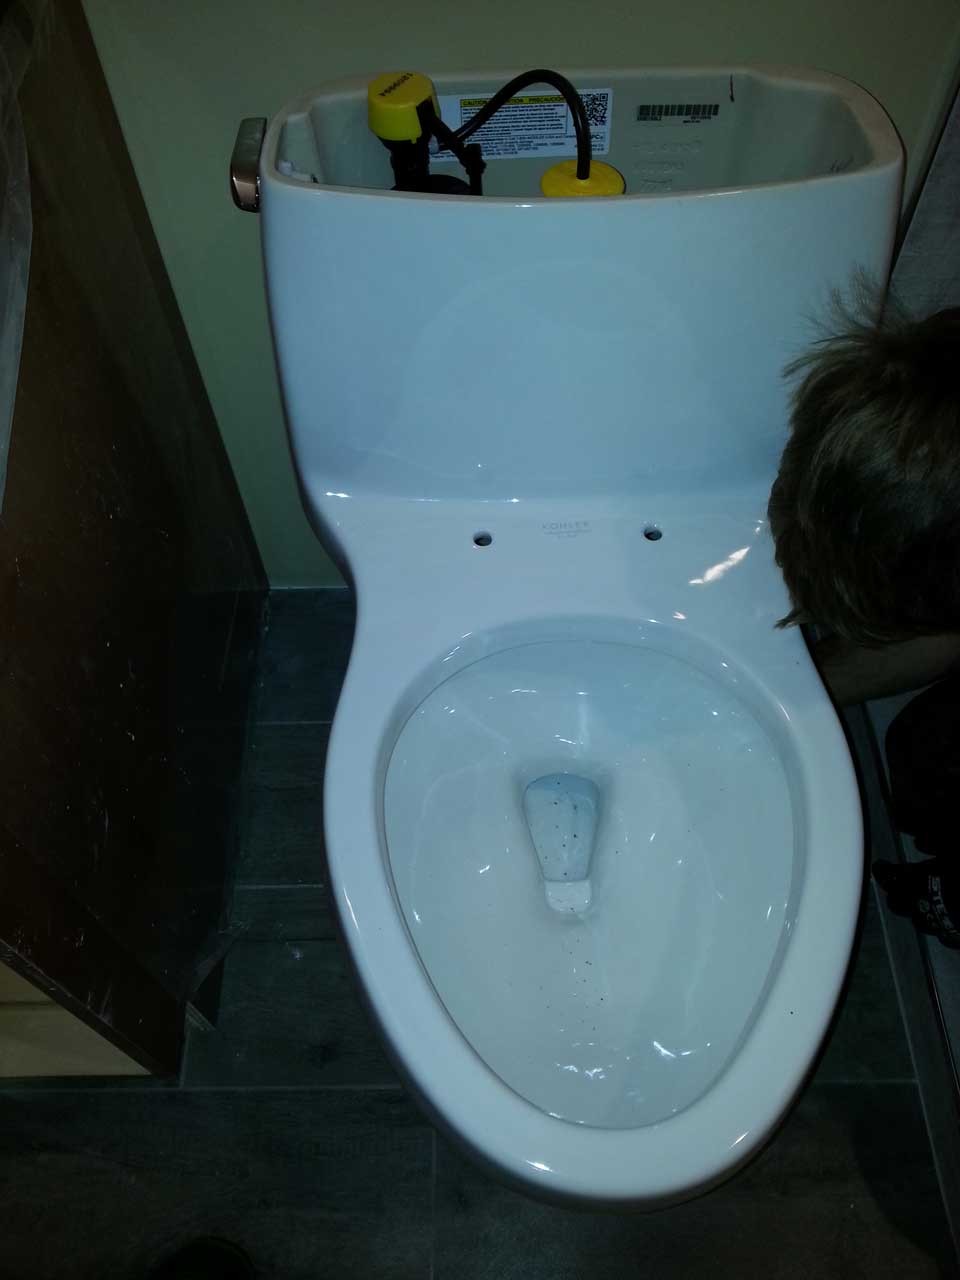
With this new toilet, the only different installation procedures were to add the spacers underneath the toilet seat and to assemble it to the holes in the toilet.
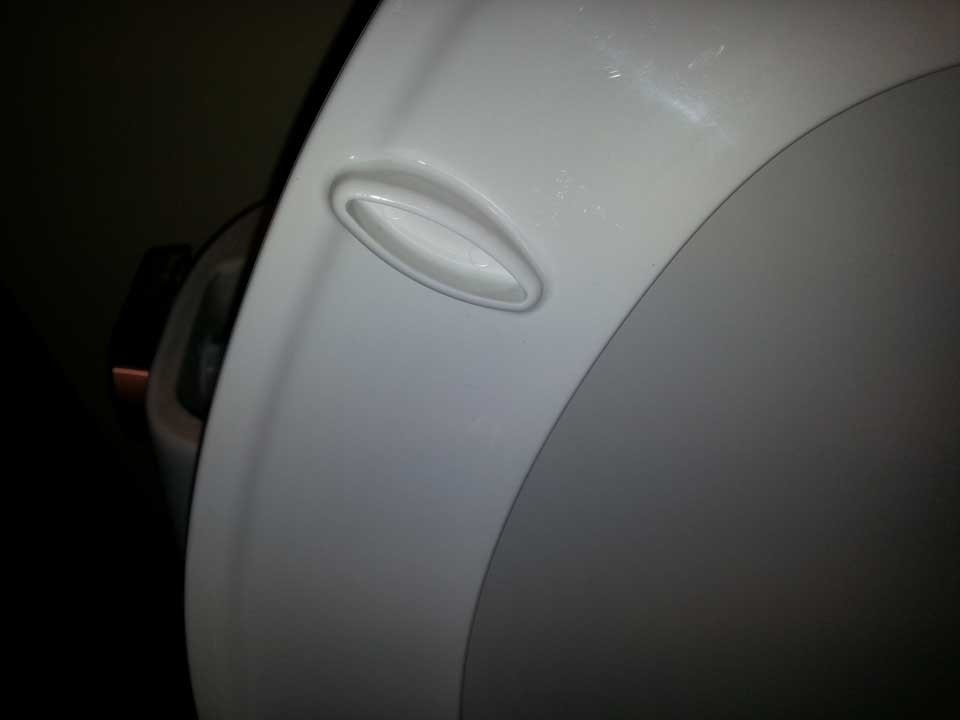
Now that we have installed the toilet seat, we can check out the rest of the procedure at https://plumber.fullstackwebstudio.com/blogitem/toiler-removal-and-reinstall.
New Toilet Installation
New toilet installation is not much different than removing and reinstalling an old toilet. The only differences are that the toilet back and toilet seat assembly which come with instructions when you buy a toilet. In some cases, toilets bowls and backs are a single piece which obviously does not require back assembly.

With this new toilet, the only different installation procedures were to add the spacers underneath the toilet seat and to assemble it to the holes in the toilet.

Now that we have installed the toilet seat, we can check out the rest of the procedure at https://plumber.fullstackwebstudio.com/blogitem/toiler-removal-and-reinstall.
Toilet Removal and Reinstall
There can be many reasons why we may want to remove the toilet; a leak around the wax ring, a faulty toilet flange, installing a new toilet and renovating the flooring. The list could go on, but, the previous reasons are quite common.
When the plan does go forward to remove and reinstall, the procedure is similar in the various instances.
The first step, is to turn off the water to the toilet. If not, water will come shooting out from the first loosened connection and create quite a mess. There will be a stop valve located between the toilet hose and wall which is what we want to carefully close.
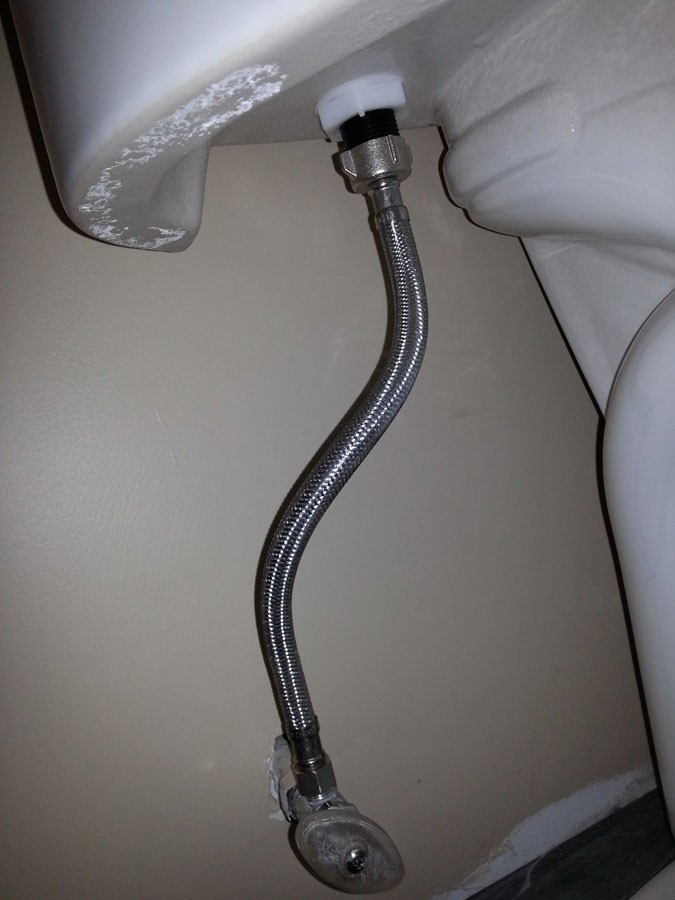
Once we have the water off, we flush the toilet to remove water from the tank and toilet bowl. However, we will need to remove trapped water from the toilet bowl with a Shop Vac and perhaps some leftovers in the tank. After that, we can disconnect the hose to the toilet while having a handy rag to soak up some some drops of water.
The next step is to remove the caps around the bottom T-bolts followed by the nuts and washers. Only a small wrench is required for this procedure, unless the washer is caked on and knife is required to lift the washers.
At this point, we can safely lift the toilet from the floor and place it sideways on the floor on some protective material like cardboard.
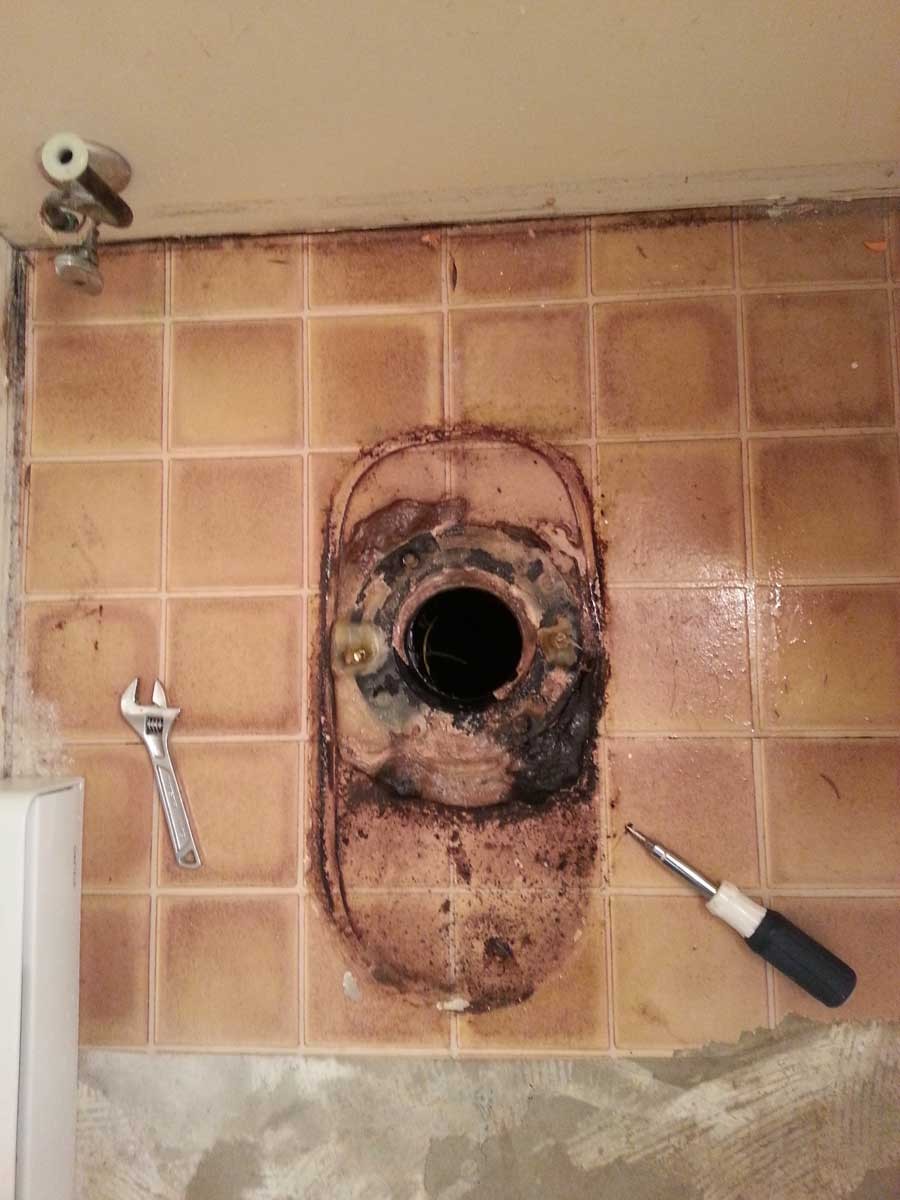
Once we have the toilet off, we can be in for many surprises. But, what we hope for is a healthy flange and minimal cleanup. If the flange is good, we clean it up. If not, we clean it up and install a flange repair kit on its surface.
Regardless of what procedure we are doing, it is a good idea to wear nitrile or latex gloves and have a rag in the flange to stop junk from falling into the hole.
In the case of a floor renovation, the flooring is also removed at this point, and the new flooring is put in place. Silicon can be applied around the flange to fill in gaps.
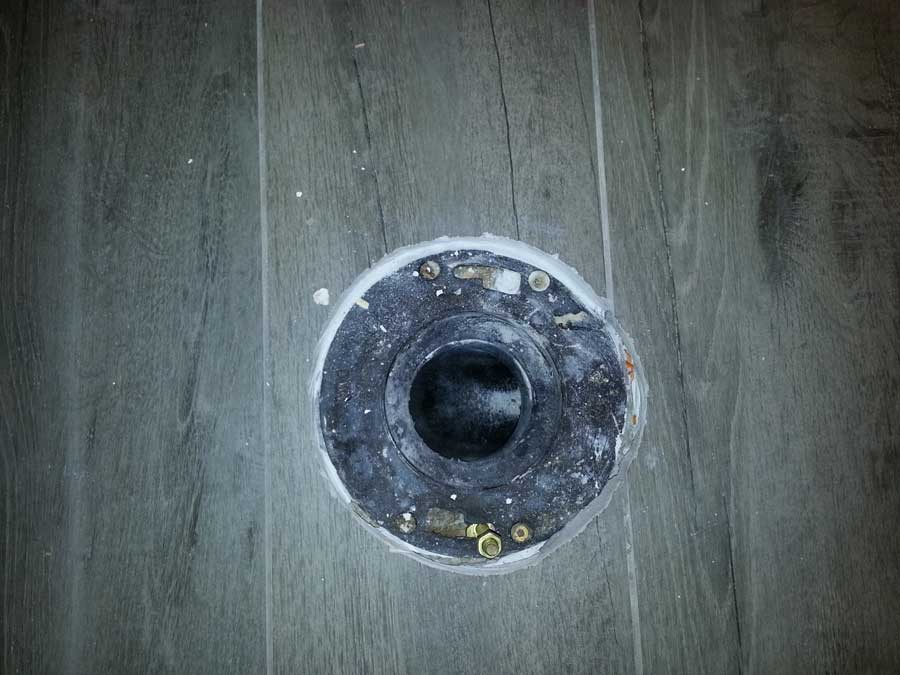
Once we have a cleaned up flange, we add a wax ring. A good rule of thumb is that if the floor height is the same or lower than the flange we use a flange with sleeve. If higher, a wax ring without sleeve will do.
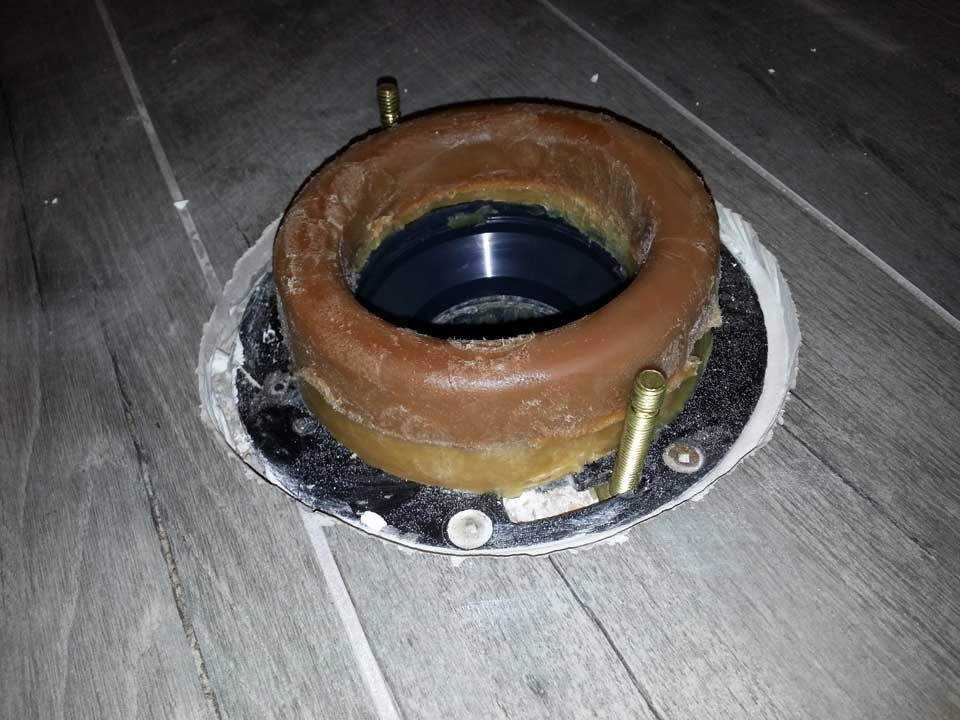
The next procedure is to clean the toilet bottom and reinstall it. We will want to position new T-bolts so the wide side goes under the narrow slot in the middle of the flange. If they do not turn easily, we can use Channel locks to turn the bolts. We should do the turn near the bottoms so the upper threads do not get stripped.
However, if the bolts are loose, we can add plastic washers that can help secure the bolts, or, we can add a washer and nut to keep them in place.

Once we have our bolts lined up in the centred position at equal distances from the wall, we place the toilet back where it came from, letting gravity and perhaps just a little help to move the toilet on the floor.
If the toilet sits flat...great. If not, we can use shims to level it followed by a bead of silicon around the outside.
Now, we can add a washer and nut to each side of the toilet and secure them in place, followed by the small covers. If the bolts are too long for the cover, we cut them with a mini hacksaw so the caps fit.
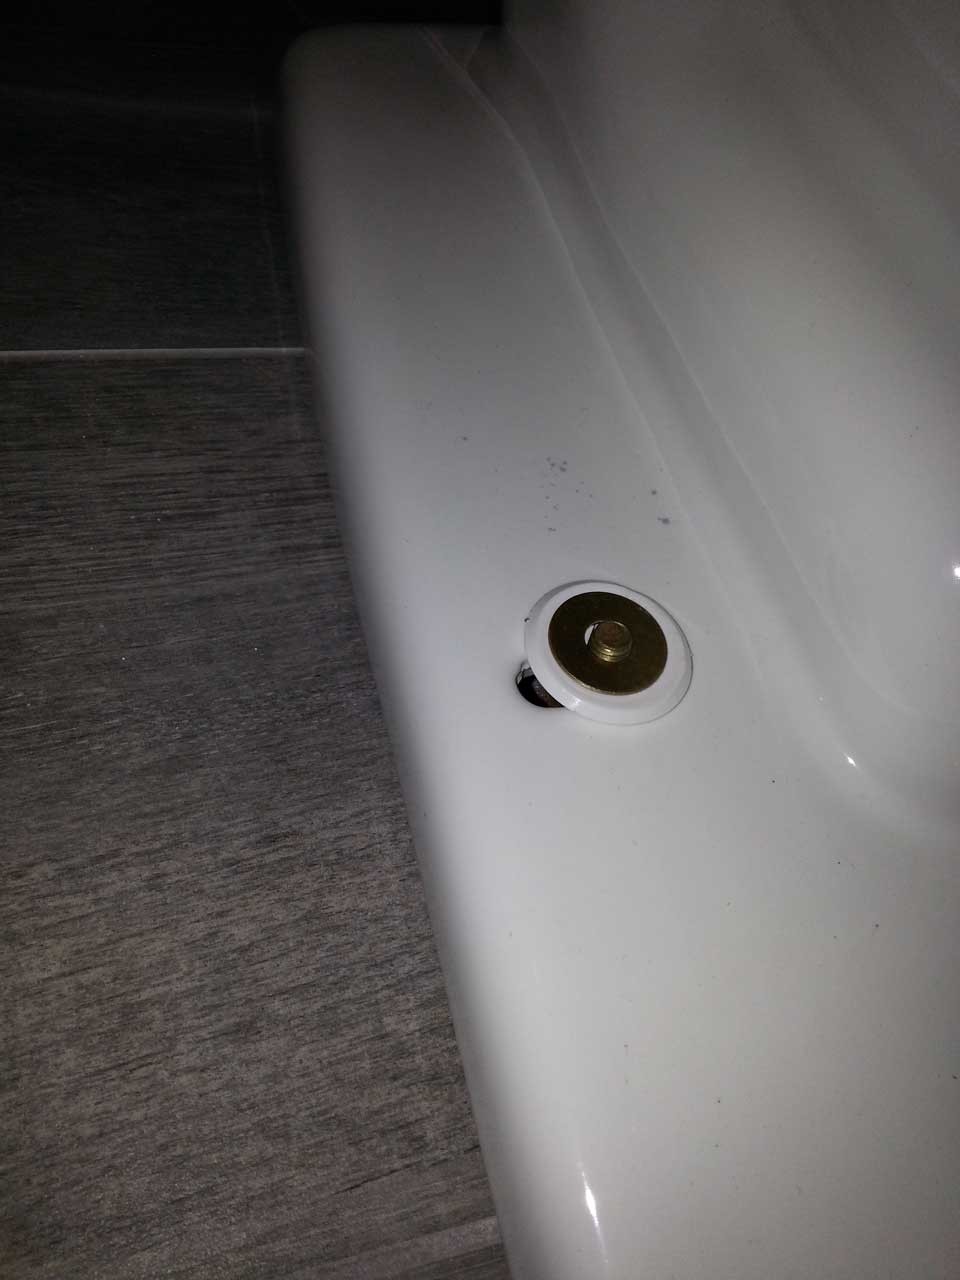
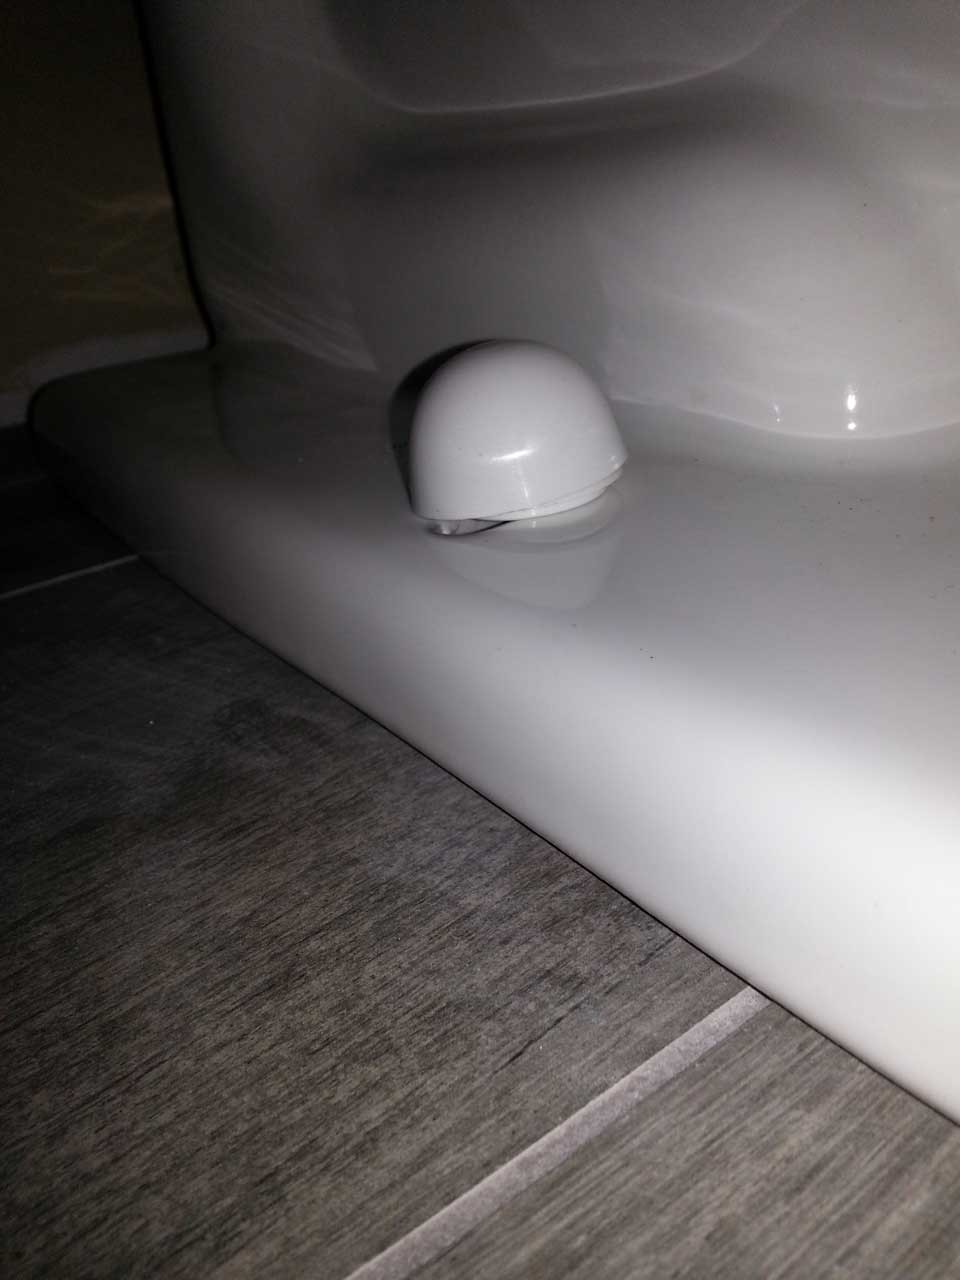
After that, we reconnect the toilet tank to the wall with a new, braided hose; such a s a 20" hose. Then, we turn the water back on, check for leaks and do a few flushes.
Hopefully, we find no leaks and have completed the task.
Radiant Heating
In a nutshell, radiant heating in a house draws heated water from a boiler and delivers it to various sections of the house. At the same time heated water is delivered, the older water in the system is returned to the boiler.
To elaborate a little further, the large 1-inch supply lines feed separate manifolds spread throughout the house. These manifolds, are connected to 1/2-inch supply and return lines that cover the floor in sections that are normally under 300 ft.
Before the radiant is laid down, manifolds are placed in strategic positions and have a specified amount of ports to handle the supply and return.
There are many ways to lay the radiant down, such as staples, plastics mats that save on concrete and talon clips, just to name a few.
In most cases, the style and spacing is critical. Some rooms can require 6-inch spacing while others can be up to 1 foot between pipes. When determining pipe length, we can calculate the square footage of a space. If 6-inch spacing is used, we will use double the square footage in pipe. Obviously, at 1 foot centers the square footage and pipe length will come close.
In addition to room spacing, the radiant will get tighter around large windows, will be around 4-inches from walls and will go around fixtures like toilets and sinks.
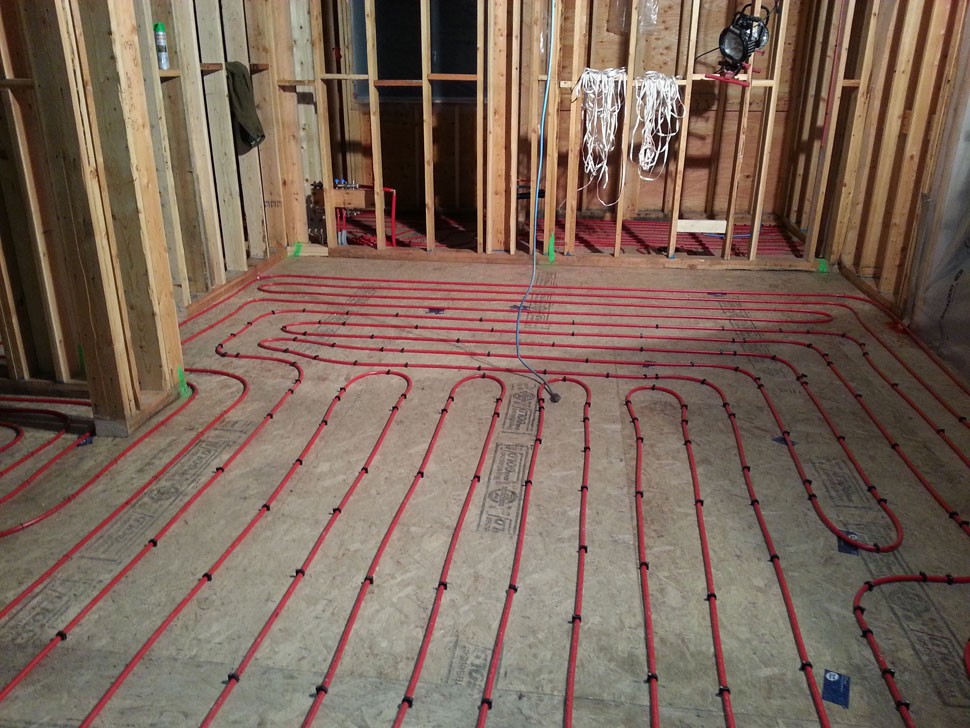
Besides that, slab sensors are inserted into spots in the flooring and each section will also be wired with 3-wire for thermostat control. Thus, the boiler can determine how to deliver the water to create the desired heat.
Math
Add Notes
Plumbing
Plumbing
Electricians
Electrician
Painters
Painters

Carpenters
Carpenters

Drywall
They say that all good things must end...someday!
Bricklayer
Introducing Chuck
Codes PHP
$variable 1b;
$variuable2 = 'all';
Here is a new line
Eventually it must cut off.
Cut off.
Video Youtube Embedded
Line #1
Line 1
Line 2
Line 3

